
Roma tomatoes are one of a juicer tomato variety that provides a huge yield. Therefore you may be interested in how to grow Roma tomatoes from scraps. Recently I tried to grow Roma tomatoes from fresh tomatoes. So this article is all about growing aroma tomatoes from scraps.
Let’s dive in to the deep to talk about the simple steps of growing roma tomatoes from scraps and some other useful information. Stay with me.
Table of Contents
What is the best way to grow Roma tomatoes?
There are many places to grow tomatoes in a garden.
People grow tomatoes in the ground of the garden, in raised beds, containers and even indoors.
Roma tomatoes also really productive in all of these conditions.
They even provide you dozens of fruits when they have grown indoor under grow lights.
But my personal opinion is to grow Roma tomatoes in a container. Because it may help to provide the required condition for the plant much easier while growing more in less space.
For example,
If you grow roma tomatoes from scraps on a raised bed, you won’t able to move them to the sunlight or protect it from heavy rain when the plant is too small.
But when you plant them in a separate container, you can move the plant, which help you to provide the needed conditions to the plant.
These Roma tomatoes will be productive from their maximum when you able to give full sun during the day. If you couldn’t, try to provide at least 6 hours of direct sunlight in a day.
Roma tomatoes are likely to grow at temperatures like 55 F – 90F. And they perform out from their best when they’re planted in the soil of around 6.0 – 6.5 of Ph value.
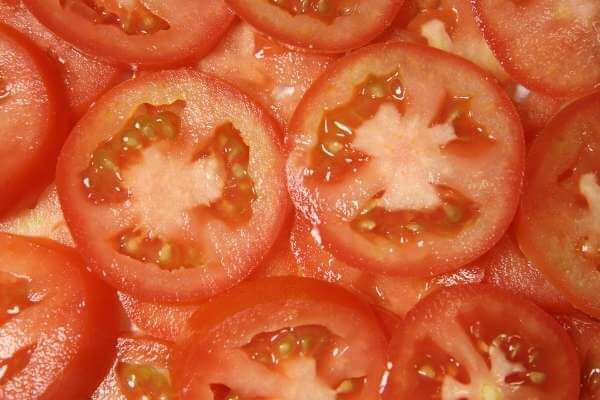
1. Cut tomatoes into slices
Now we are on the first step of growing tomatoes from tomato slices.
Here’s the thing.
You are using Roma tomato scraps/slices to grow a new plant. But the key is the germinated seeds on those scraps. A new plant is growing from those seeds.
So how do ferment those tomato seeds and prepare those tomato seeds for planting?
It’s that easy.
You need to use well-ripened and matured Roma tomato fruit scarps for this process.
It’s much better those scraps are from an overripen tomato fruit.
Here’s why
When the fruit is maturing well, the seeds are also maturing. Well-matured an germinated seeds are most useful for planting.
So the first requirement is to find one or two well-ripened tomatoes or scraps of them.
But you have to make sure those parts contains enough seeds if you are using scraps of roma tomatoes.
Then cut the roma tomatoes into thin little slices. You can cut do each fruit into 5 or 6 slices for this process.
If you are lucky, you will be able to have more than 15 Roma tomato plants from just one Roma tomato fruit!
Isn’t that crazy.
2. Get the pot and soil mix ready
Now we are arriving at the part that going to decide if your Roma tomatoes are going to grow well or not for the first time.
First you need to find a pot with drainage holes.
Actually, it’s not should be a usual pot or a container that we are using. It needs to be like a basin that has more space.
Because this isn’t the container that we are going to plant Roma tomatoes forever.
Potting mix adding
Now it’s the time for add the potting mix to the container.
Because any kind of tomato variety loves healthy soil, you have to use 60% garden soil and 40% compost mixture for the potting mix.
But before you put the soil into the basin, you have to make sure that you have mixed these two types of soil well.
If you haven’t, roots won’t get the same taste of the soil every time.
Firstly, add soil for 3/2 of the pot and then you have to place the Roma tomato slices or scraps on it.
Also, don’t put too many tomato slices in a container. Keep the distance for at least 3″ for each slice.
Then cover it with a fine layer of the same potting mix. But you have to make sure, that layer is a little bit loose and should be able to react with the air.
Don’t have a potting mix? This guide will help you to make your own tomato potting mix at home.
Because when growing roma tomatoes from scraps, you need to exposure them to the air for seeds to germinate properly.
Now add some water onto it.
3. Provide the light requirements
Now you have to provide the sunlight to those roma tomato scraps for start growing.
Sunlight is a leading factor that help to germinate tomato seeds way quicker.
So if you couldn’t do well at providing sunlight for your containers your effort also going to lose with growing Roma tomatoes from scraps.
Here’s what they need
To make things happen quickly, you have to keep the basin or the container in partial shade.
But not in the full sun like traditional tomato planting.
I was able to see some leaves are getting off the ground from 7 days.
When that occurs with your tomato slices, you are still required to keep the container in partial shade until it grows up for some more.
Luckily I could able to see a 3 inch tall Roma tomato plant in just 16 days. I think your plant also can reach that height from 2 weeks.
But make sure that you have watered it as much as possible, without leaving the soil to dry.
So when the plant is up to 3 inches, it’s ready to exposure under the full sun.
4. Transplant each of the tomatoes in the final location
When you have arrived at this step, you have finished half of the process of growing Roma tomatoes from scraps.
Now we are going to transplant those little tomato plants which you have got from the slices of the Roma tomatoes.
But for transplant them, the plant should be at least 6 inches tall.
If it isn’t, you have to wait for some time. Because the roots of the Roma tomato plants are maturing when its getting taller.
Usually it takes up to a month to get taller as for 6 inches when you are growing roma tomatoes from scraps.
I was able to hit that milestone in 28 days 🙂
Get the transplanting potting mix ready
Firstly, before you transplant the Roma tomato plants, you have to make some healthier potting soil for planting it.
And that soil should be, well-drained and should be well nutritious soil. Because tomatoes love that type of soil.
You can make that potting mix on your own by using a mixture of 60% garden soil and 40% compost which we have also used to plant Roma tomato slices.
Carefully uproot the plant from the early container
This is a part of this process of growing Roma tomatoes from scraps that you have to be very careful.
If you do something wrong in this part, sometimes it may be affected to die that tomato plant.
The thing you need to do is uprooting the little 6 inches grown Roma tomato plant for transplant it in the final location.
But when you are doing that make sure you don’t hurt any of roots in those little Roma tomato plants
You can make this process way easier by using a gardening trowel to uproot those tomato plants from the seedling pot.
Here’s a trowel I recommend you to have with your garden, that only one for the lifetime, which sells by amazon.
And again, would like you to say that, don’t move the root balls here and there because it can be annoying to the roots.
Also be very careful when you are lifting it out from the container.
Now replant the Roma tomato plants
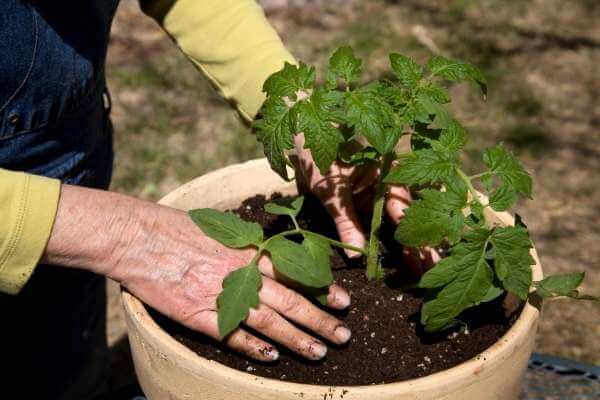
At the moment you have ready with your potting soil mix and with removing the plant from the seedling pot.
It’s the time for replanting it on another container.
Note:- In this guide I’m showing you the way you can grow multiple Roma tomato plants in a one container. If you need to grow each one of them alone, you can use a 5 gallon bucket or something.
Firstly, you need to have a container or a polythene grow bag with 15-20 inches of diameter and 15 inches deep.
And make sure it contains drainage holes to drain water.
Then place that container in the location that you wish to grow Roma tomatoes from scraps, in your place.
Then add that mixture of soil into the container.
After adding the soil, again you have to dig a hole that 4 to 6 inches deep to sit the new plant.
But before you plant those Roma tomato plants which you’ve grown from scraps, there is something to do.
You have to cut off the leaves in the bottom of the plant.
That’s because when you cut them out, it helps the plant to sprout some more adventitious roots on its stem.
Adventitious roots are those little buds that you can see on the stem of any type of tomato plant.
Those roots are helping the plants to grow much wider and produce more fruit.
However after you’ve cut those leaves at the bottom, bury the plant in the hole you dig on the container.
Only 3/2 of the plant should be bury in the soil.
But make sure that only the top few inches of the plant is off the ground.
After you’ve finished all those things, water the plants to reduce the transplanting shock.
Tips to follow when transplanting Roma tomatoes which grown from scraps
The first tip I have for you is to maintain a gap between two Roma tomato plants such as 1.5 feet.
After you’ve transplanted the plant in the container, don’t just exposure the tomato plants to direct sunlight.
Because of the transplanting shock, the tomato plant couldn’t tolerate too much sunlight.
So try to keep the plant in the partial shade for at least two days.
Then after you can keep those Roma tomato plants outside for the direct sunlight.
They will be like to have 4 -6 hours of direct sunlight per day.
The last tip is to water the plant as much as when it is needed.
You can measure the moisture of the soil using your finger. And if you using plastic containers it will be save the moisture of the soil for a longer time.
If you have issues with water when growing tomatoes, read my helpful guide about how to grow tomatoes with less water.
However, these 3 tips may help you for having better results when you grow Roma tomatoes from scraps.
5. Provide support for tomato plants
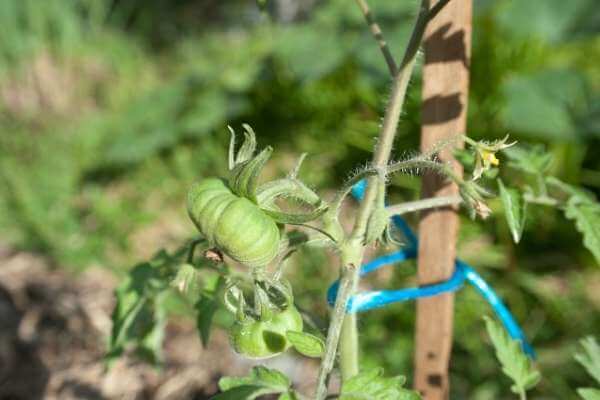
As the fifth step of growing Roma tomatoes from tomato slices, you need to help tomato plants with a supporter.
But not as quick as after replanting it on the new container.
Give some time for the tomato plant to grow up. When it’s getting closer to 1.5 feet, you have to think about supporting it.
Because when the plant getting taller, the stem of the tomato plant is also getting bigger.
So taller tomato stems are likely to lay down if there is a heavy blow of wind. Sometimes they hurt from the heavy rain.
Therefore, there are some fair reasons for you to use support for your Roma tomato plants.
Here’s what to do
Find some straightened wooden sticks that way taller than your tomato plant.
Then insert it closer to the stem. But don’t disturb the main rot of the plant.
After that tie the stick and the stem loosely from a twine.
Note:- Tight the twine for too much can be caused to dry the upper part of the plant or fallen down it from the stem.
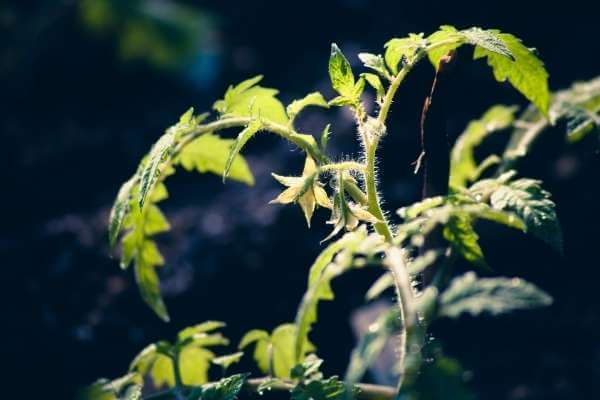
6. Pollinating Roma tomato plants
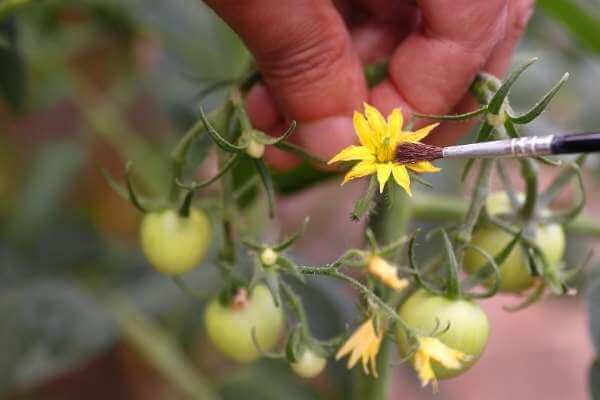
pollinating is a wonderful process which has invented from the nature for a better productivity of the plants.
Even if we grow Roma tomatoes from the scraps we throw out of the kitchen, pollinating is still doing a big part of that process.
Pollinating is the process that transferring pollen grains from one plant to another.
In my experience, you can see some flowers are blooming on your Roma tomato plants nearly a month after transplanting it on the new container.
So it will be the time you need to think about pollinating the flowers of your Roma tomato plant.
Naturally pollinating is happening through the air and from the insects like bees and butterflies.
But if you do wish to grow Roma tomatoes from scraps, in your small space garden or in the basement, how should you get a good air movement and insects on to it?
And also in the seasons that doesn’t blowing wind for enough, will be not supporting to pollination process of any kind of plants.
The key is hand pollinating.
It’s easy.
Just shake the each flower in each tomato plant.
It will be caused to spread the pollen grains everywhere in the tomato trees.
If you are lucky, you will able to see the result of this hand-pollinating method after 35 – 40 days.
And also you can grow some bee attractive flowers nearby tomato plants for more bee attractive.
I found that this article is really helpful in attracting bees to your tomato garden.
These tips to increase the pollination of tomatoes might be helpful to you.
7. Water & Fertilizing for Roma tomato plants
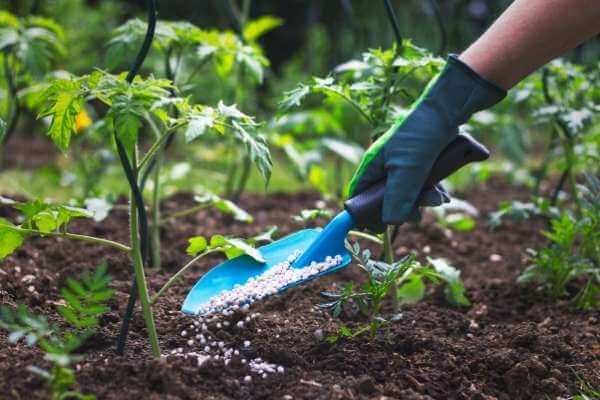
Fertilizing is very important whatever that you planting for growing up.
For tomatoes, it’s way more higher than any food producing plant in your garden.
When you are in the process of growing Roma tomatoes from scraps, you have to fertilize each plant after every 3 weeks from an organic fertilizer like compost.
Here are some organic fertilizers that you can use with Roma tomatoes.
- Fish meals
- Vermi compost
- Chicken manure
- Cow manure
- Organic cottonseed meal
When you are using these fertilizers on the tomato plants, don’t just spread these things on the surface.
Instead, mix them well from your hand with the potting mix.
Then water the container thoroughly.
You have to repeat this process after every 3 weeks.
Whenever you are watering the plant, just water to the soil. Not for leaves.
Because over-watering leaves can be like calling out for fungal diseases!
Also you should water by considering the soil moisture.
I’m pretty sure if you’ve done all right until here, you will e able to see some small to medium-sized green tomatoes within 2 months after replanting Roma tomatoes in the new containers.
8. Pests control
Pest controlling is an essential part of the gardening.
Even if you have done all the things correctly, if pests attack your garden, all of your effort will be loss.
Specially for the Rom tomatoes the harm from pests are even more. Because they are more juicer.
Here’s the thing
Because of you are planting and grow Roma tomatoes in pots or containers, you will have a little bit of excuse from pests.
That’s because you can move the container as you prefer, and some f the pests that coming out from the soil couldn’t slightly affect to your Roma tomato plants.
But we should stay alive!
One of the simple ways that you can prevent those insects and pests is using wood ashes for the tomato plants.
To make sure that, read my guide about is wood ashes god for repelling insects.
Or you can make your own pest controlling liquid for treat your tomato plants.
You can watch this video to know about how to make DIY pest-controlling liquid at home.
I think above video may help you to make a pest controller on your own when you are growing Roma tomatoes.
But if you aren’t still unsatisfied with this DIY pest controller you can buy a good pesticide.
This is what I recommend which is called Bonide(BND210). It’s applicable for plants in all seasons. You can find this pesticide from here on Amazon.
9. Harvest your Roma tomatoes
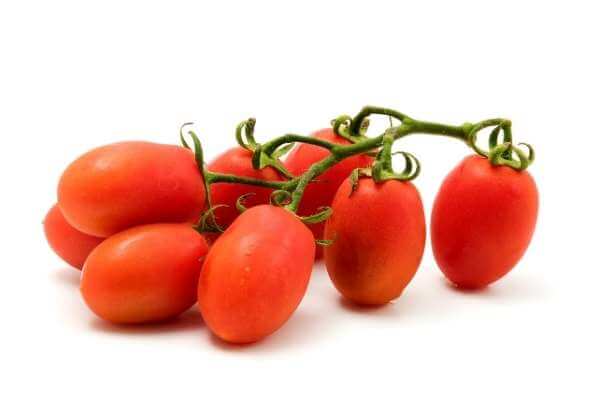
Now I have take you to the final nd the happiest part of growing Roma tomatoes from scraps.
As the first advice in harvesting Roma tomatoes, I’d like to say that to use a support when the plants are providing large amount of fruits on them.
However, around 2 and half months after transplanting, you can see that fruits are changing colour from green to yellow and yellow to orange.
When you are up to the third month, most of the Roma tomatoes are almost well ripened. But some of them are ripening too early.
So check the plants every day and pick all well-ripened Roma tomatoes. Don’t let them being over-ripened.
Some of the fruits can be hidden from the leaves of the plant. So don’t miss them!
Eventually all of the Roma tomatoes will be full-ripened when you hit the third month.
If you want to try growing Roma tomatoes from scraps again, leave 2 tomatoes from your harvest for that.
Tips for growing Roma tomatoes faster from tomato slices
Here are some valuable tips to accelerate the yield while you growing Roma tomatoes.
Warm up the soil
Mostly, every variety of tomatoes love warm conditions. So much so they like warm soil too.
As you and me know, plants are likely to grow better when they having their favorite conditions out there.
Therefore espousing the soil for the sunlight can help to grow Roma tomatoes much faster.
Whenever the plant is in smaller, don’t use mulch on it. Give them sunlight.
If you growing tomatoes in pots, containers or in beds, this works much better.
Use mulch in the right time
When you want to grow Roma tomatoes from their scraps way faster, you have to wait for the best time to use mulch on it.
Specially new transplanted plants which has the transplanting shock, you need to wait at least a month to use mulch until the soil warms up from the sun.
Once the summer begins and when the sun gets harder, you can use mulch.
Water much more but not more often
I found that Roma tomatoes need to be more watered but less often to perform their best from growth and yield.
Roma is a foliage and fruit heavy tomato variety. So it need to be more watered.
But watering them more often can push them to the disease called blossom ends.
Because of you’re using mulch in the too warm periods, it won’t be hard for the plant to keep the required moisture for long.